Overview
In this article I talk about how I setup my Neovim configuration on a Windows OS. If you are going to use my configuration on your machine, you should already know the ins and outs of Neovim and the Terminal.
Terminal
Neovim runs in a Terminal, and you can use any terminal of your choice. I personally use Windows Terminal Preview and as of this writing, it is on version 1.13. You can download it here.
Choco Install
I use Chocolatey to install Neovim which is a package manager for Windows. You can head over to the Chocolatey website and install it, or run the following in an elevated terminal with administrative permissions to start the install:
Set-ExecutionPolicy Bypass -Scope Process -Force; [System.Net.ServicePointManager]::SecurityProtocol = [System.Net.ServicePointManager]::SecurityProtocol -bor 3072; iex ((New-Object System.Net.WebClient).DownloadString('https://community.chocolatey.org/install.ps1'))
Install Neovim
Now that Chocolatey is installed, we will now use the Chocolatey package manager to install Neovim. Open an elevated terminal and run the following to install Neovim:
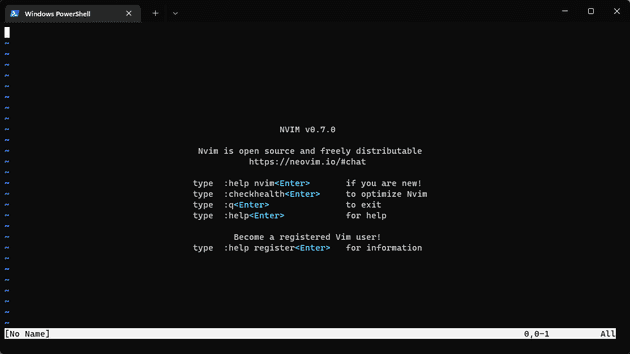
Restart the terminal and type nvim and you will see the Neovim welcome page:
While this article isn’t how to use Neovim, if you have never used it before, here are a few quick commands for your reference so you can get around Neovim:
Insert Mode: i
Command Mode: ESC
Quit Neovim: :q <enter>
Quit without Saving: :q! <enter>
Save the file: :w <enter>
Navigation: h j k l
Save the file to a new path: :w new_name <enter>
Install vim-plug
Next, we will install vim-plug which is a package manager for Neovim. Open a PowerShell terminal and run:
md ~\AppData\Local\nvim\autoload
$uri = 'https://raw.githubusercontent.com/junegunn/vim-plug/master/plug.vim'
(New-Object Net.WebClient).DownloadFile(
  $uri,
  $ExecutionContext.SessionState.Path.GetUnresolvedProviderPathFromPSPath(
    "~\AppData\Local\nvim\autoload\plug.vim"
  )
)
Example:
Configure Neovim
Now we need to find which directory we should place our init.vim file which is where we will store the Neovim config. In Neovim, we can run :echo stdpath('config') to find the location as seen below:
Create a file called init.vim in the directory where you ran :echo stdpath('config'). For example:
nvim C:\Users\<profile>\AppData\Local\nvim\init.vim
Then paste the following config:
call plug#begin('~/AppData/Local/nvim/plugged')
Plug 'joshdick/onedark.vim'
Plug 'iCyMind/NeoSolarized'
Plug 'iamcco/markdown-preview.nvim', { 'do': 'cd app && yarn install' }
Plug 'vim-airline/vim-airline'
Plug 'vim-airline/vim-airline-themes'
call plug#end()
Example:
Save the file, quit Neovim and restart. Run :PlugInstall to installed the plugs:
In the previous section, we installed vim-plug to manage our Neovim plugins. Now, we will finish configuring the init.vim file with our customizations:
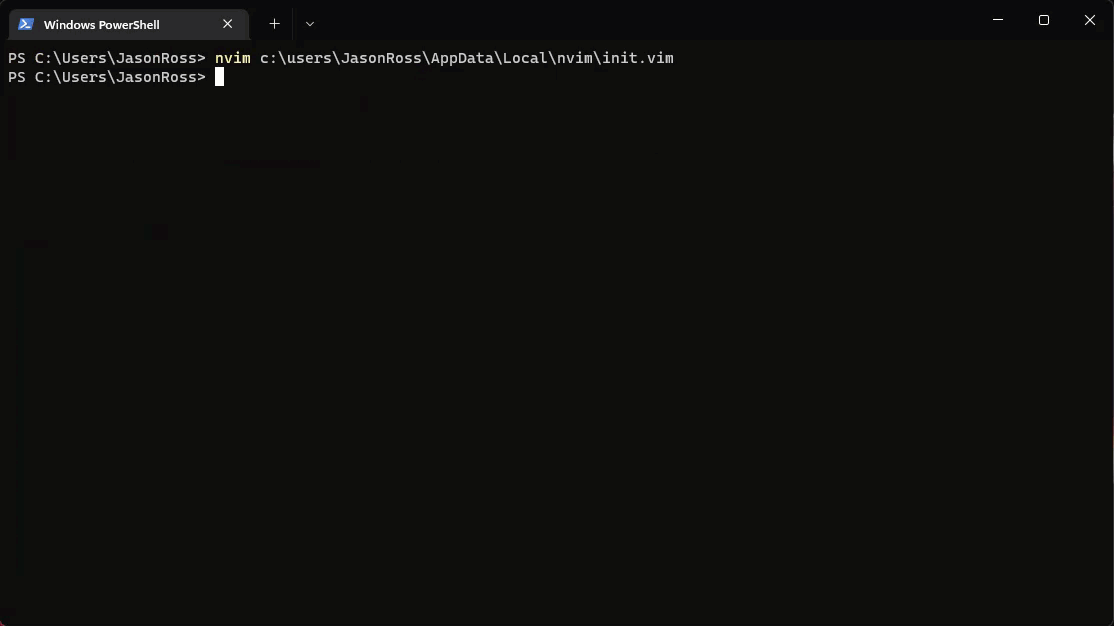
Go back and edit our init.vim file by running the following in the PowerShell terminal:
nvim c:\users\JasonRoss\AppData\Local\nvim\init.vim
Delete all lines in the file and paste the following:
set encoding=UTF-8
call plug#begin()
Plug 'nvim-lua/plenary.nvim'
Plug 'nvim-telescope/telescope.nvim'
Plug 'christoomey/vim-tmux-navigator'
Plug 'bling/vim-airline'
Plug 'norcalli/nvim-colorizer.lua'
Plug 'alvan/vim-closetag'
Plug 'Xuyuanp/nerdtree-git-plugin'
Plug 'tiagofumo/vim-nerdtree-syntax-highlight'
Plug 'airblade/vim-gitgutter'
Plug 'junegunn/fzf', { 'dir': '~/.fzf', 'do': './install --all' }
Plug 'junegunn/fzf.vim'
Plug 'neoclide/coc.nvim', {'branch': 'release'}
let g:coc_global_extensions = ['coc-emmet', 'coc-css', 'coc-html', 'coc-json', 'coc-prettier', 'coc-tsserver', 'coc-highlight']
Plug 'leafgarland/typescript-vim'
Plug 'peitalin/vim-jsx-typescript'
Plug 'junegunn/fzf', { 'dir': '~/.fzf', 'do': './install --all' }
Plug 'junegunn/fzf.vim'
Plug 'iamcco/markdown-preview.nvim', { 'do': 'cd app && yarn install' }
Plug 'dracula/vim'
Plug 'EdenEast/nightfox.nvim'
Plug 'projekt0n/github-nvim-theme'
Plug 'folke/tokyonight.nvim', { 'branch': 'main' }
Plug 'scrooloose/nerdtree'
Plug 'ryanoasis/vim-devicons'
call plug#end()
set number
set relativenumber
set smarttab
set cindent
set tabstop=2
set shiftwidth=2
set expandtab
set mouse=a
inoremap jk <Esc>
tnoremap jk <C-\><C-n>
autocmd FileType * setlocal formatoptions-=c formatoptions-=r formatoptions-=o
set backup
nnoremap <C-p> :FZF<CR>
let g:fzf_action = {
\ 'ctrl-t': 'tab split',
\ 'ctrl-s': 'split',
\ 'ctrl-v': 'vsplit'
\}
" if (has("termguicolors
'colorscheme': 'tokyonight'}
colorscheme duskfox
let g:NERDTreeShowHidden = 1
let g:NERDTreeMinimalUI = 1
let g:NERDTreeIgnore = []
let g:NERDTreeStatusline = ''
autocmd bufenter * if (winnr("$") == 1 && exists("b:NERDTree") && b:NERDTree.isTabTree()) | q | endif
nnoremap <silent> <C-b> :NERDTreeToggle<CR>
autocmd VimEnter * NERDTree
" " open new split panes to right and below
set splitright
set splitbelow
tnoremap <C-h> <C-\><C-n><C-w>h
tnoremap <C-j> <C-\><C-n><C-w>j
tnoremap <C-k> <C-\><C-n><C-w>k
tnoremap <C-l> <C-\><C-n><C-w>l
map <C-h> <C-w>h
map <C-j> <C-w>j
map <C-k> <C-w>k
map <C-l> <C-w>l
tnoremap <Esc> <C-\><C-n>
au BufEnter * if &buftype == 'terminal' | :startinsert | endif
function! OpenTerminal()
split term://bash
resize 10
endfunction
nnoremap <c-n> :call OpenTerminal()<CR>
set clipboard+=unnamedplus
set guifont=SpaceMono\ Nerd\ Font:h13
let g:airline_powerline_fonts=1
func! WordProcessor()
map j gj
map k gk
setlocal formatoptions=1
setlocal noexpandtab
setlocal wrap
setlocal linebreak
setlocal spell spelllang=en_us
set thesaurus+=/home/test/.vim/thesaurus/mthesaur.txt
set complete+=s
endfu
com! WP call WordProcessor()
let g:ctrlp_user_command = ['.git/', 'git --git-dir=%s/.git ls-files -oc --exclude-standard']
Quit Neovim and open again. It will open with an error message which is expected because we have not run :PlugInstall since we copy and pasted the latest config. Once you have finished running :PlugInstall, restart Neovim and you should now see the customizations:

Installing NerdFont
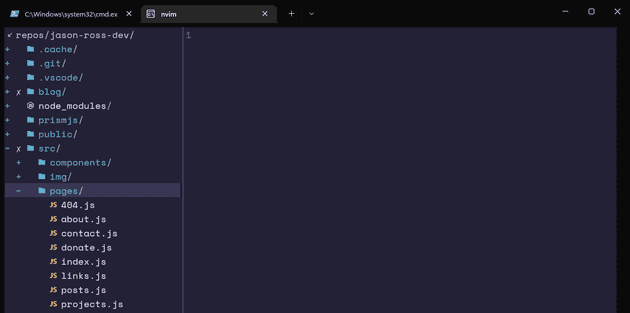
The file manager you see on the left side is a plugin called NerdTree. We are also using vim-devicons which should put the appropriate icon next to our files and folders in NerdTree. As you can see from the screenshot above, there are no icons, just boxes. This is because we need a special font to display the icons. We will fix that by installing a compatible font on our machine and set that font in our PowerShell Terminal profile:
I am going to use SpaceMono. Open the zip file and install Space Mono Nerd Font Complete Windows Compatible.ttf.
- Open Windows Terminal Preview
- Settings
-
- Name: nvim
- Command line: %SystemRoot%\System32\WindowsPowerShell\v1.0\powershell.exe
- Starting directory: %USERPROFILE%
- Appearance > Font face: SpaceMono NF
This is an example of NerdTree working with icons: